Supply Chain Management calculates demand forecasts by using the Azure Machine Learning Service, which you must set up and run on your own Azure subscription. This post describes how to set up the Azure Machine Learning Service in Azure and then connect it to your Supply Chain Management environment.
Azure Machine Learning Studio (classic) has been deprecated, it has been replaced by the Azure Machine Learning Service, which provides similar functionality and more.
In order to make a successfully installation using the GitHub its necessary that you install all pre-requisites on your machine to run the PowerShell script without error. We recommend that you use Visual Studio Code as a code editor to modify the Python files.
Pre-Requisites:
- Visual Studio Code | Download Visual Studio Code – Mac, Linux, Windows
- Install Git | Git – Downloads (git-scm.com)
- Python 3.11 or later | Download Python | Python.org
- Azure Cli | Install the Azure CLI for Windows | Microsoft Learn
The Installation:
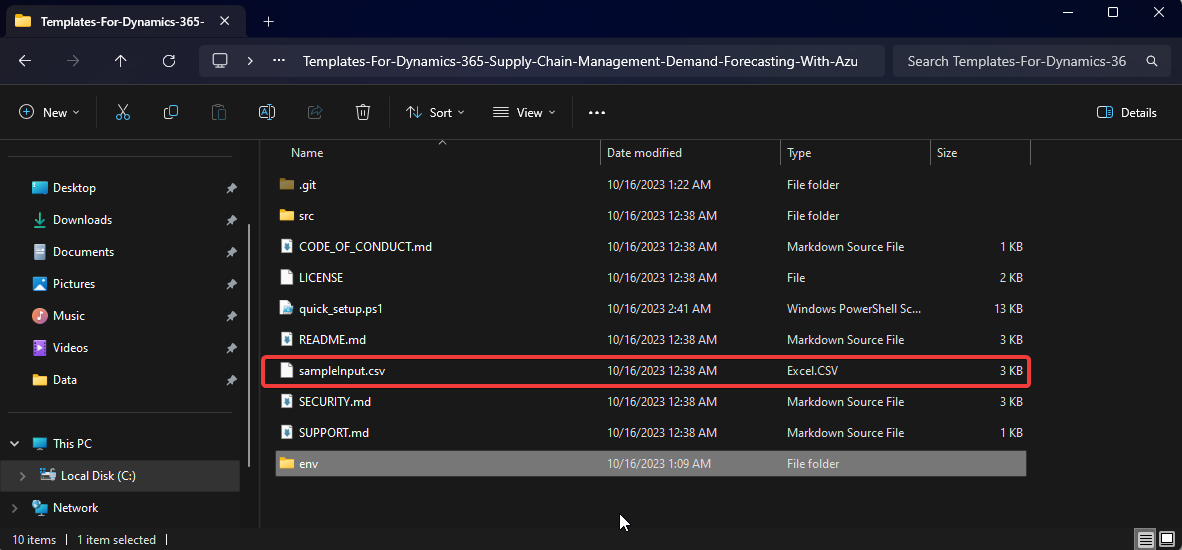
After install all requirements, its necessary clone the GitHub repository with the templates for Dynamics 365 Supply Chain Management Demand Forecasting.
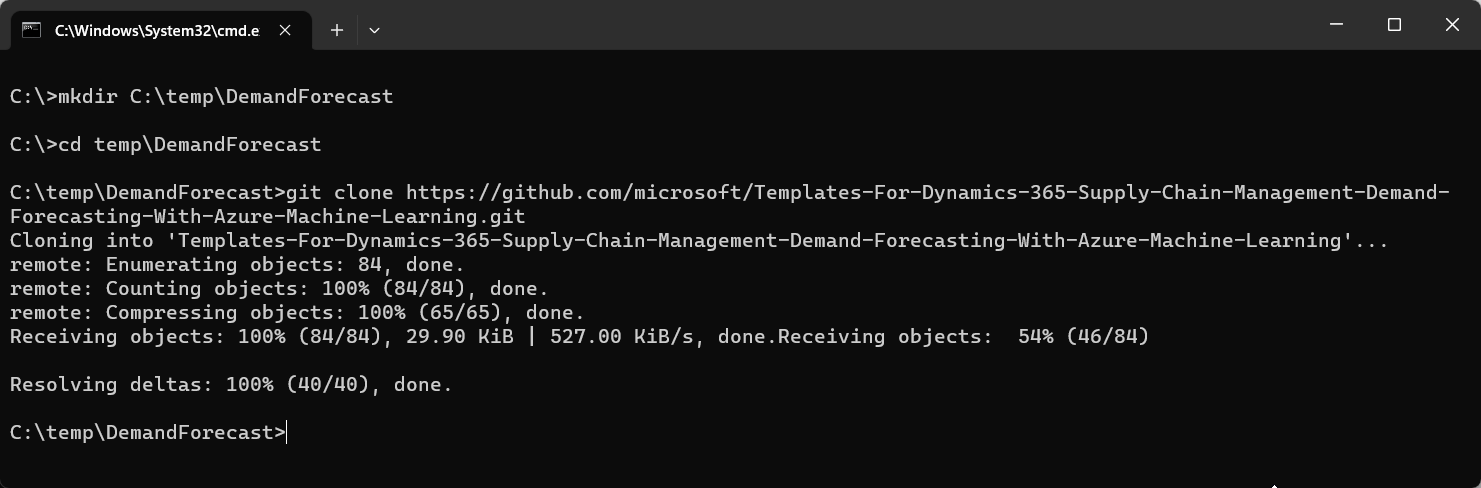
Open a CMD Windows and create a DemandForecast folder on C:\Temp
C:\>mkdir C:\temp\DemandForecast
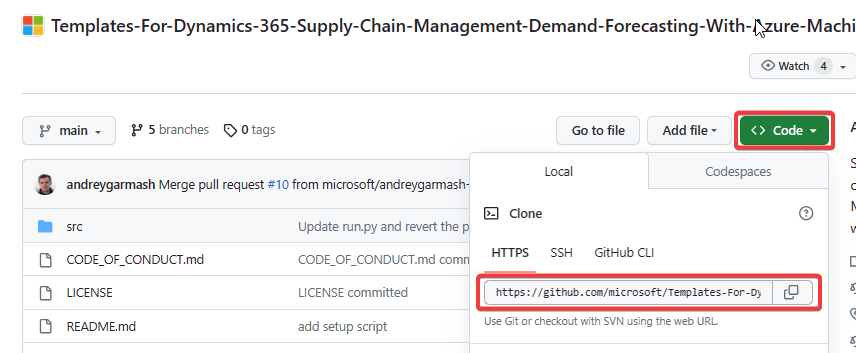
C:\>cd temp\DemandForecastTo clone the repository in the local folder you need to copy the GitHub repository URL, for that you should go to GitHub and on the code button, copy the URL that them we will use with Git command to clone it locally.
On the same CMD windows execute the following command to clone repository
C:\temp\DemandForecast>git clone https://github.com/microsoft/Templates-For-Dynamics-365-Supply-Chain-Management-Demand-Forecasting-With-Azure-Machine-Learning.git
The Python installers for Windows include pip. You can make sure that pip is up-to-date by running:
py -m pip install --upgrade pip
py -m pip --version
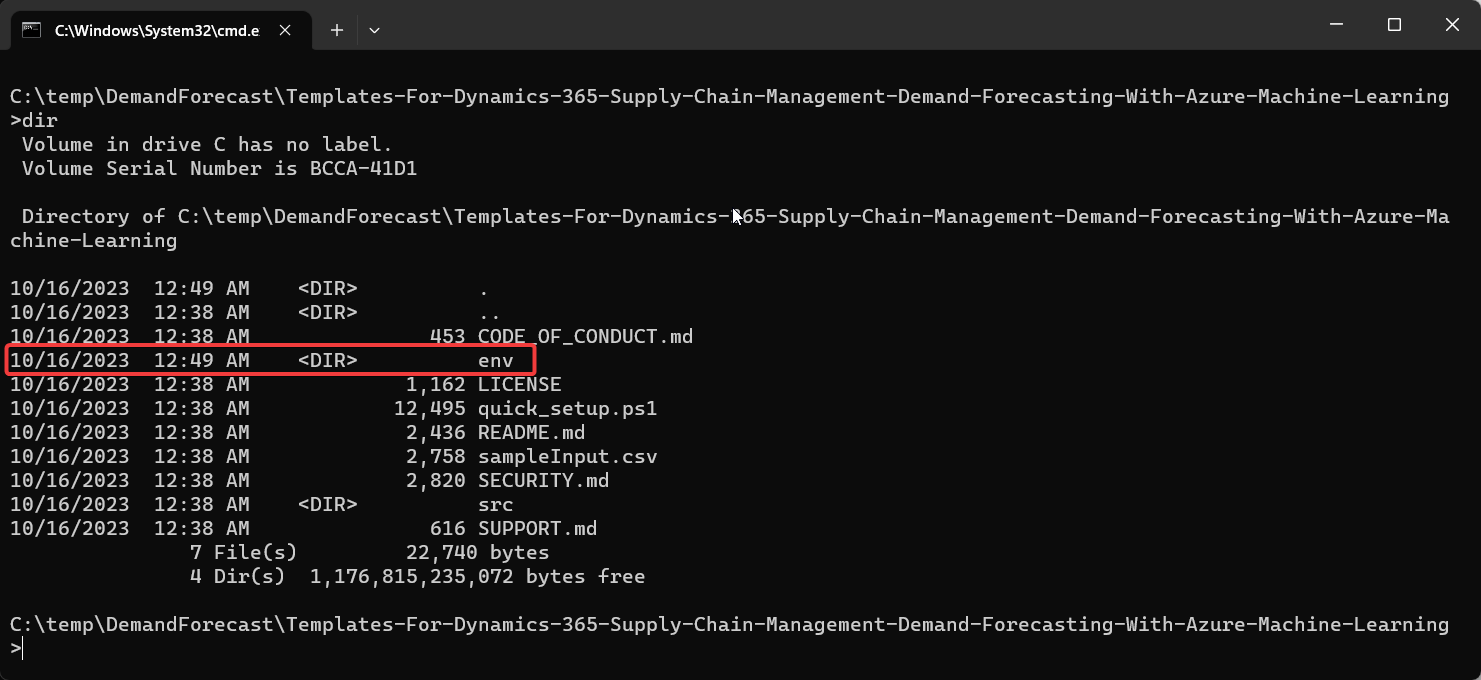
After clone repository go to the created folder and create a virtual environment of Python to install all required extensions only for this repository folder to make the installation.
Execute the following command to install the virtual environment extension for Python.
pip install virtualenv

After install the virtualenv, its necessary to create the virtual environment and install the extensions for this.
py -m venv env
This command creates an env folder on the cloned repository
To activate the virtual environment and install the the missing extensions we must execute the following command after changing the CMD to PowerShell
#PowerShell
.\env\Scripts\Activate.ps1
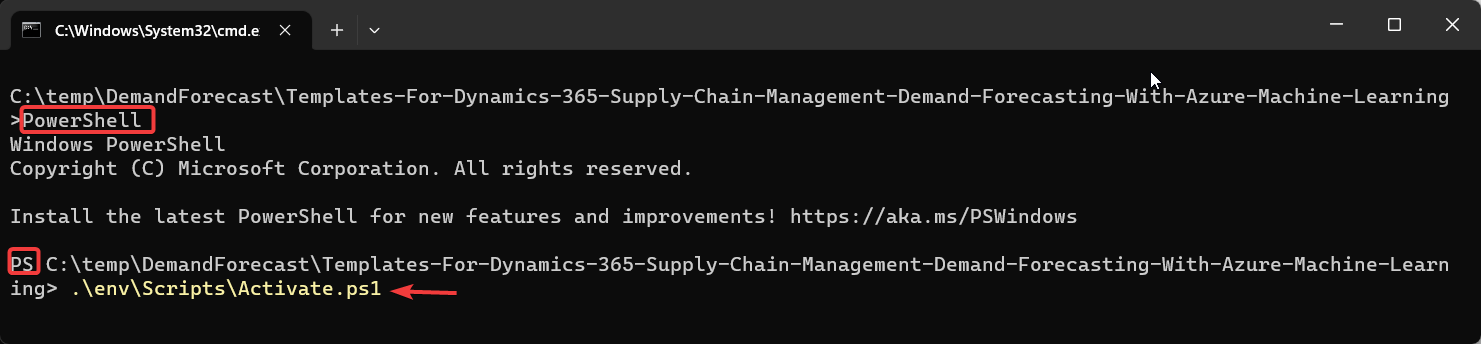
When the environment is active, you will see the (env) at the beginning of the command line path.

Some extensions of Azure are required before to execute the quicksetup.ps1 file. To install them, you should execute the following command.
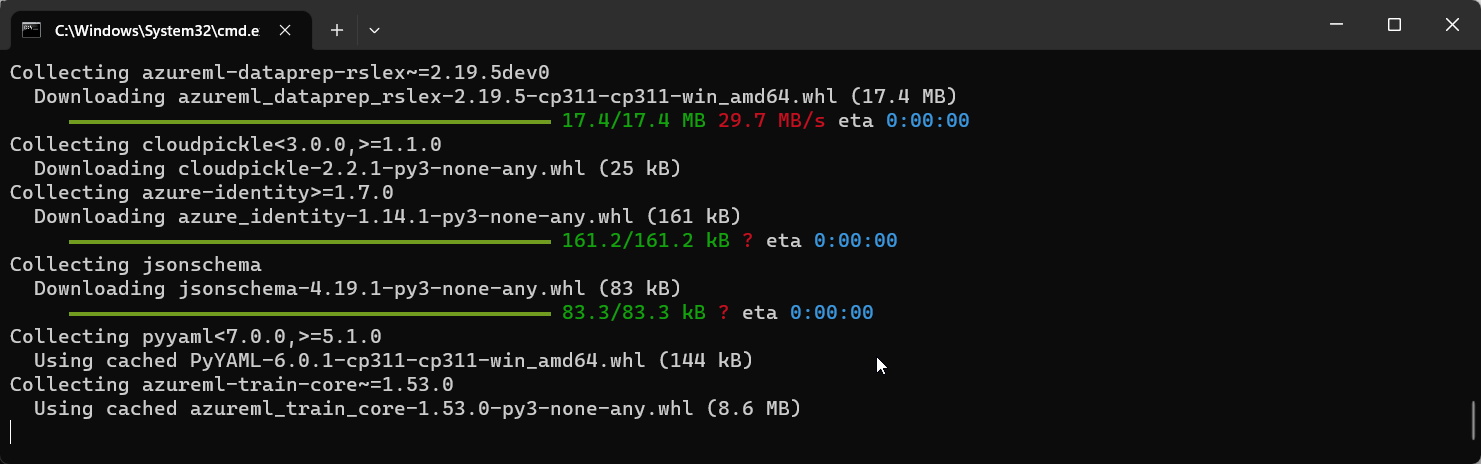
pip install azureml-core~=1.18 azureml-pipeline~=1.5 argparse azureml-dataset-runtime[fuse,pandas]~=1.5

When installing Azure Cli, the ml (machine learning) extension is normally installed, and in order to correctly execute our quicksetup.ps1, it is only necessary to have the azure-cli-ml extension, therefore we must ensure that Only the latter is installed and for this we are going to remove both and install only the azure-cli-ml one. For this it is necessary to execute the following commands:
az extension remove -n azure-cli-ml
az extension remove -n ml
Install azure-cli-ml extension
az extension add -n azure-cli-ml -y

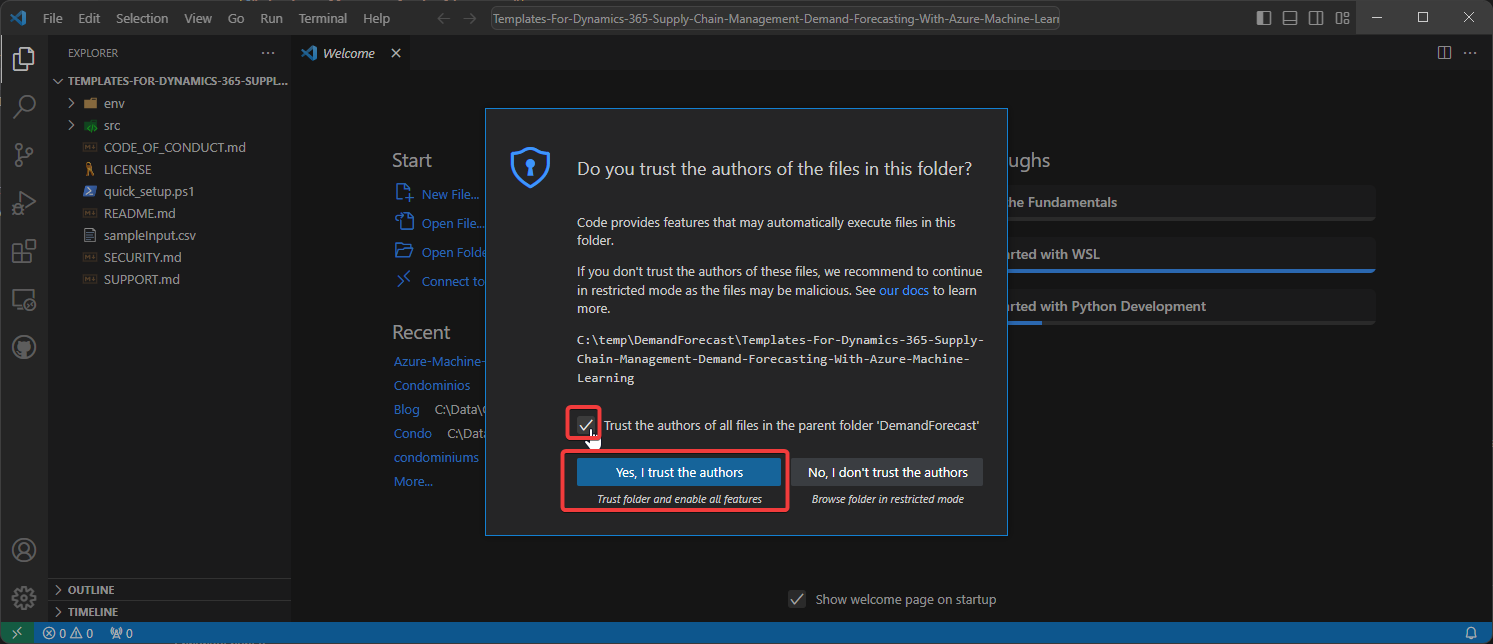
Now we must open our Visual Studio Code to edit the parameters file and then run quick_setup.ps. To do this, from the command window we execute the command “Code.” and this will open our VSCode positioned in the forlder of our local repository.

Be sure to mark the repository as safe so that the files in it can be opened safely
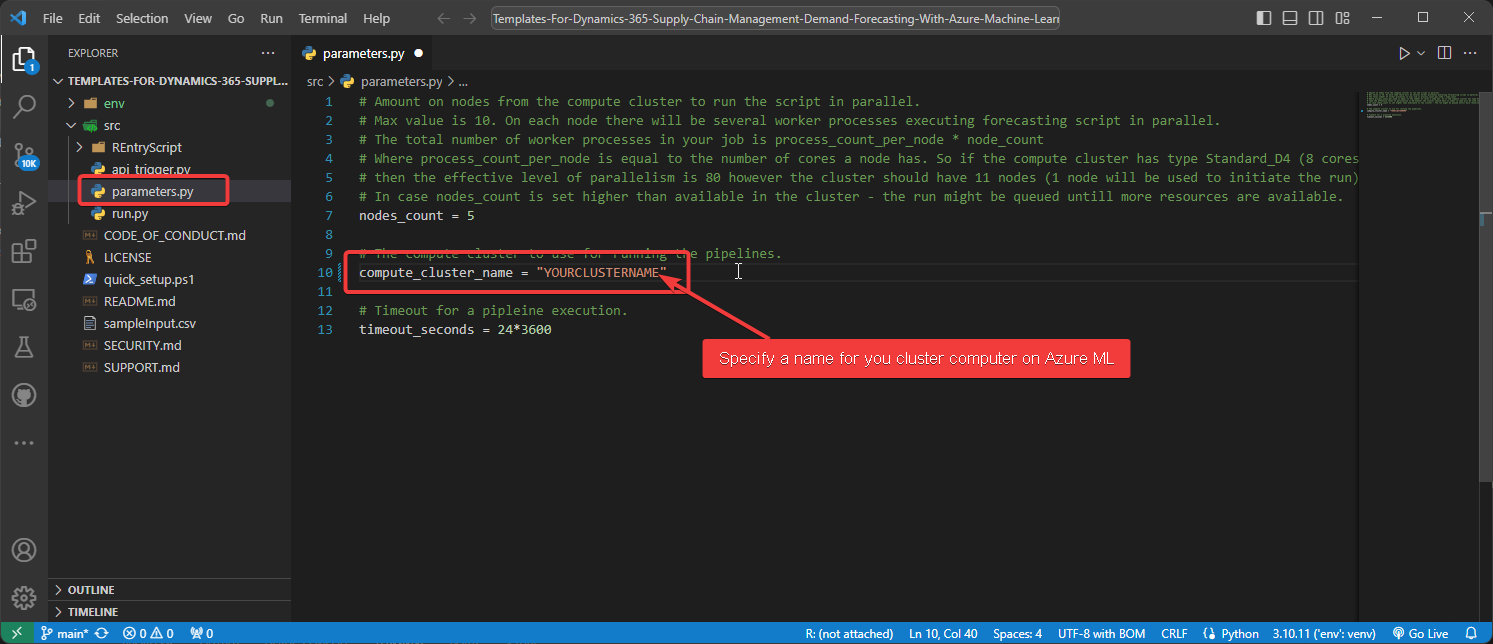
The next step is to edit the parameters file and specify a name for the cluster computer in Azure machine learning:
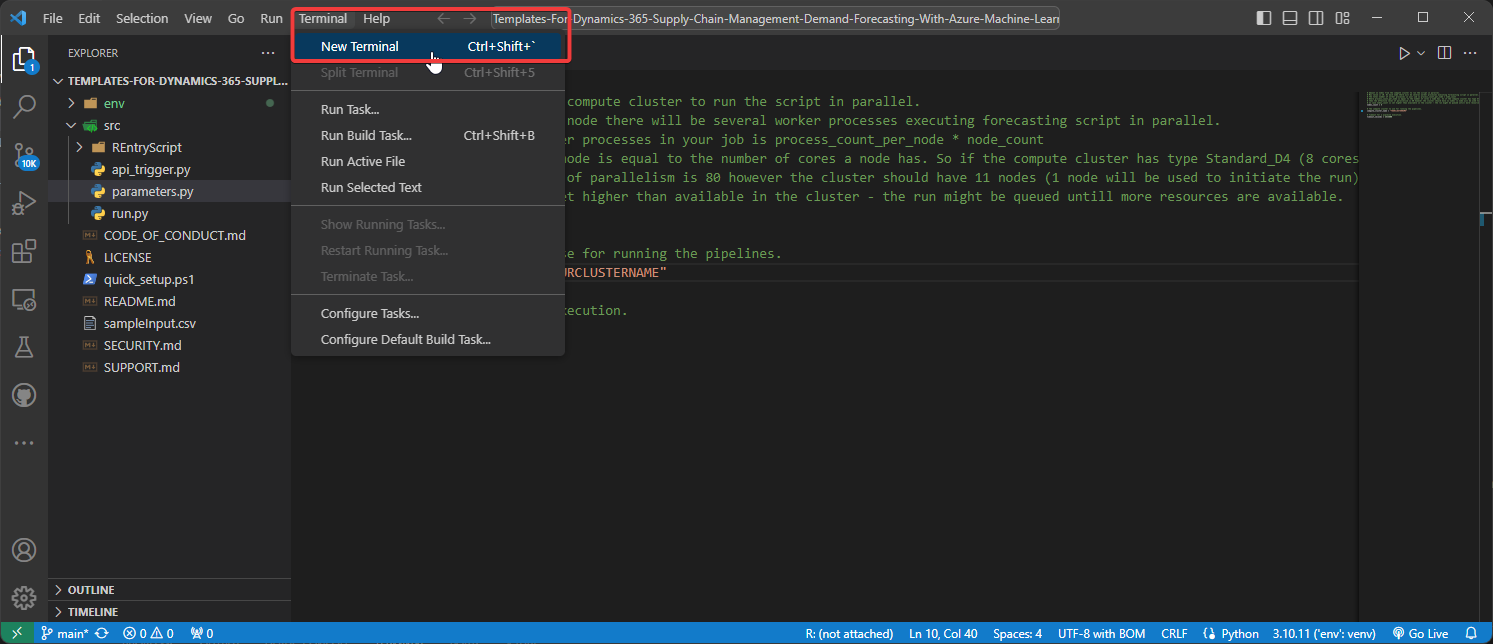
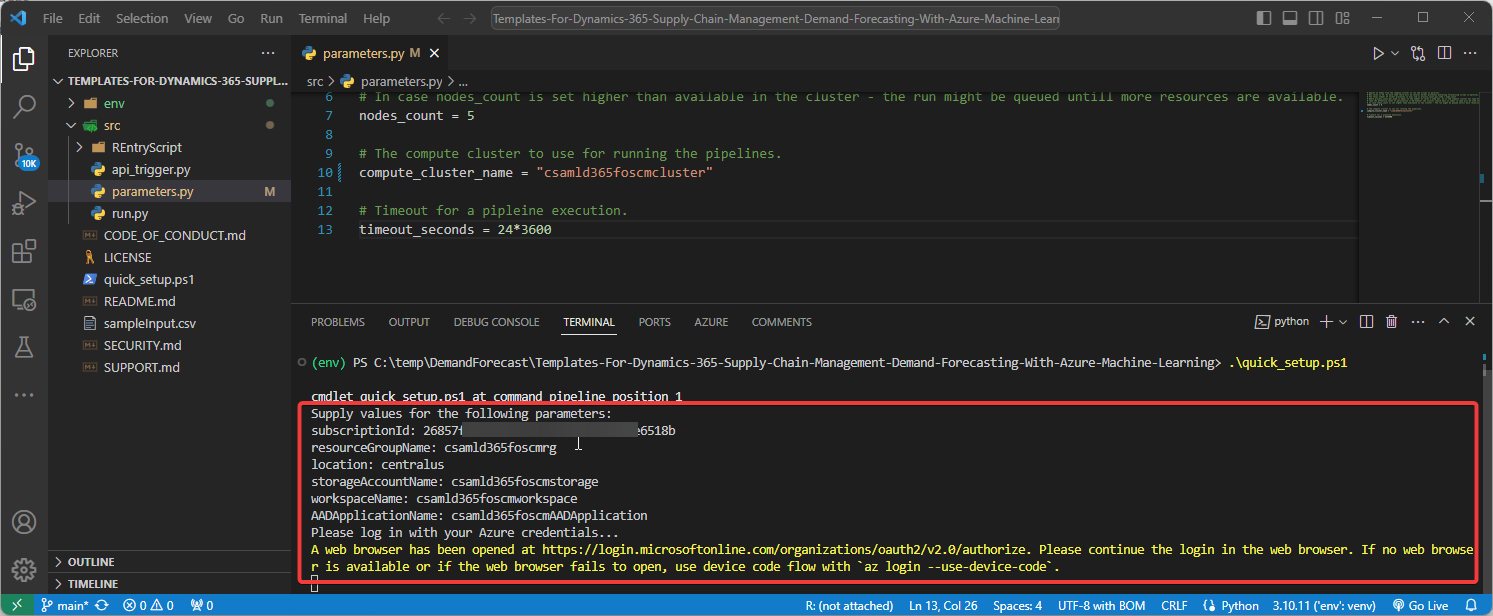
Open a new terminal and execute the quick_setup.ps1. In this step, you will need to provide the ID of your Azure subscription, a name for your resource group that will group all the objects to be deployed, a name for the storage account, a name for the Machine Learning workspace.
Again, we must activate the python virtual environment so that the extensions that we previously installed are available when executing the PowerShell script that will install Machine Learning.

Now we can execute our PowerShell script.
.\quick_setup.ps1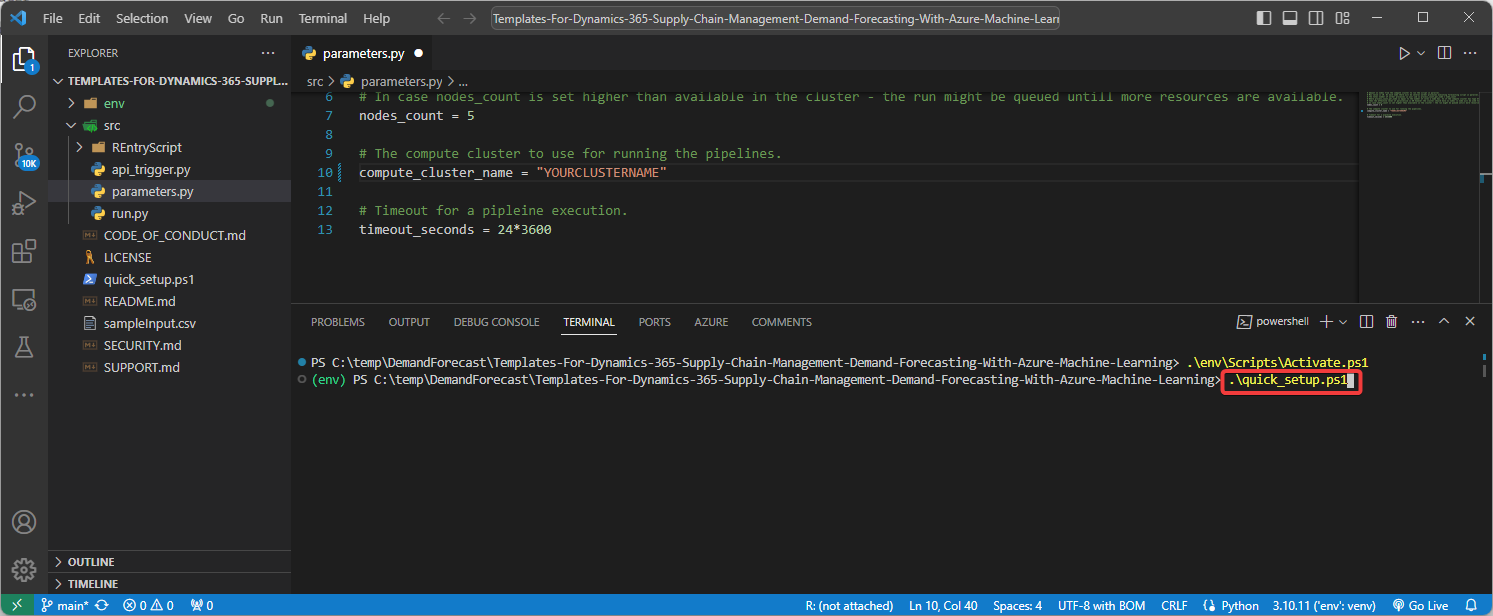
Provide each of the requested data as follows: Azure Subscription id, resource group name, Azure location, storage account name, machine learning workspace name, Azure Active Directory Application name and authenticate with the Azure Active directory credentials of the account with which the deployment will be done. It is recommended that this account have owner privileges on the Azure subscription.
The setup execution errors:
ERROR: {‘Azure-cli-ml Version’: ‘1.41.0’, ‘Error’: ComputeTargetException:
Message: Compute name ‘notebookScryptExecutor‘ is not available. Reason: AlreadyExists. Message: The specified name notebookScryptExecutor is already in use and is therefore unavailable
InnerException None
ErrorResponse
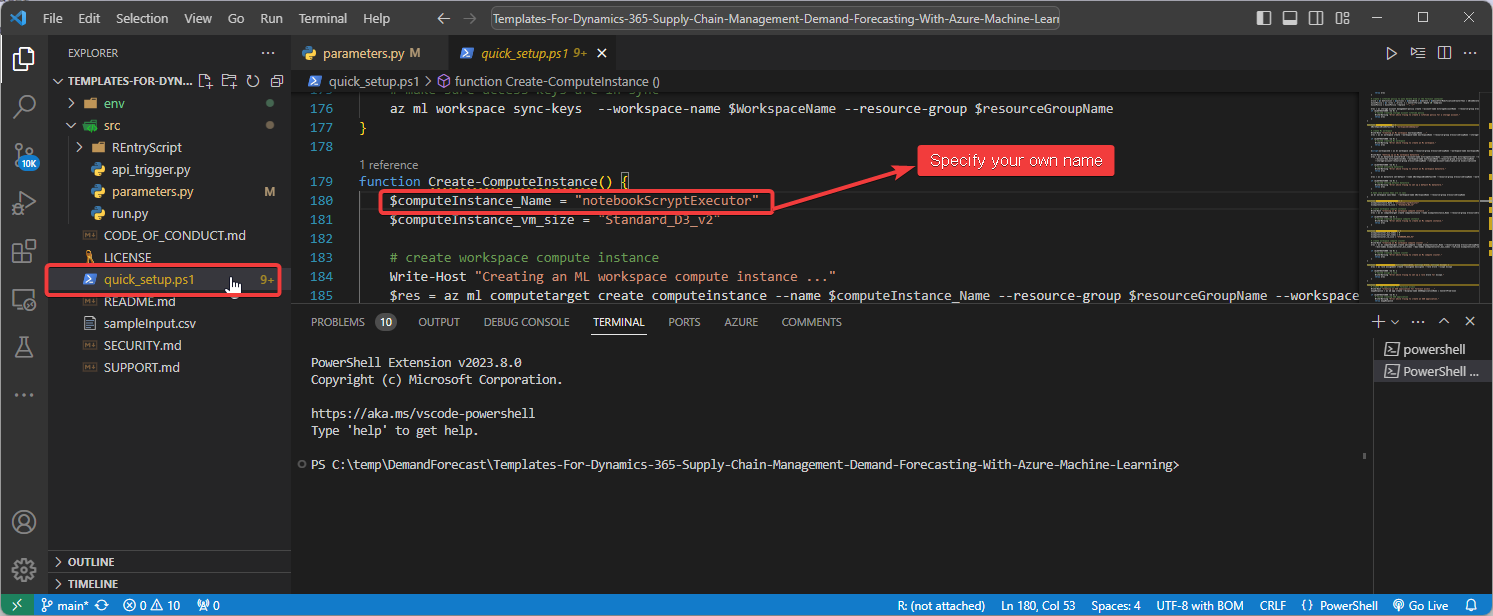
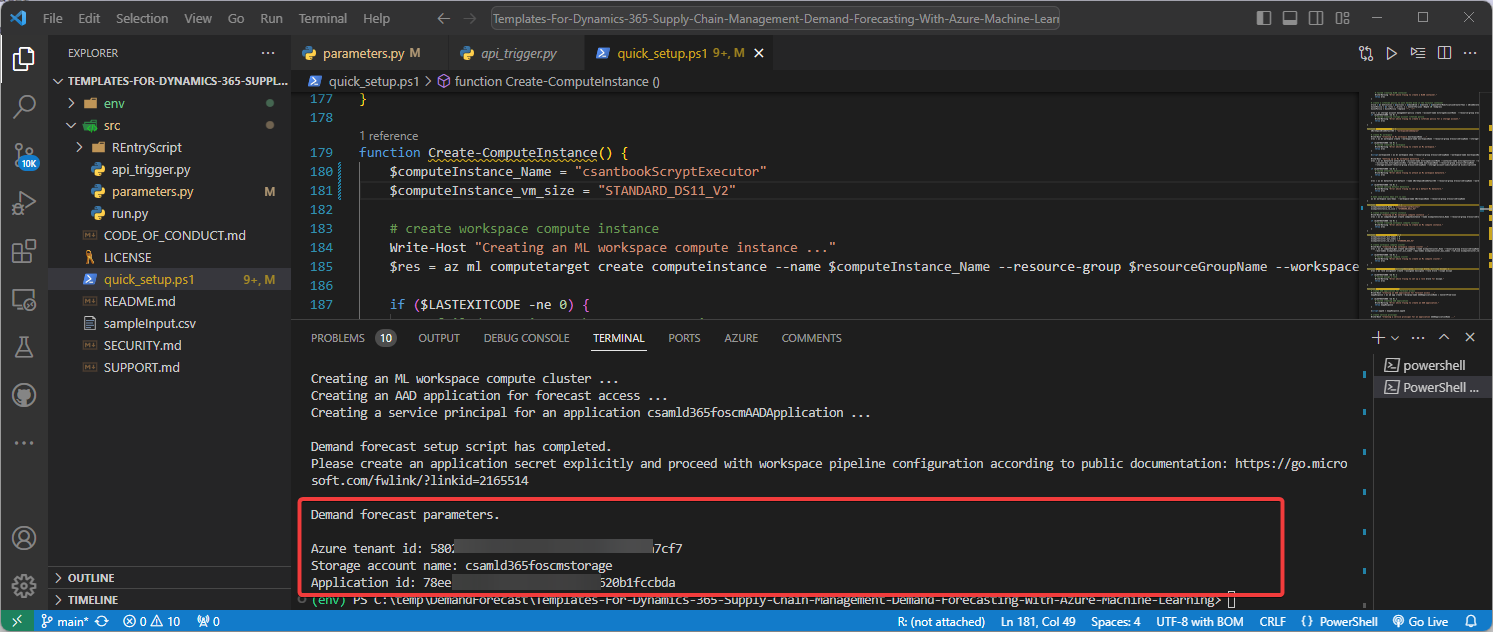
It is likely that you will receive the following error which has already been reported but you can easily fix it by editing line 180 of the PowerShell file, giving a unique name (A name for an Azure ML Compute Instance must be between 3 and 24 characters in length) for your deployment:
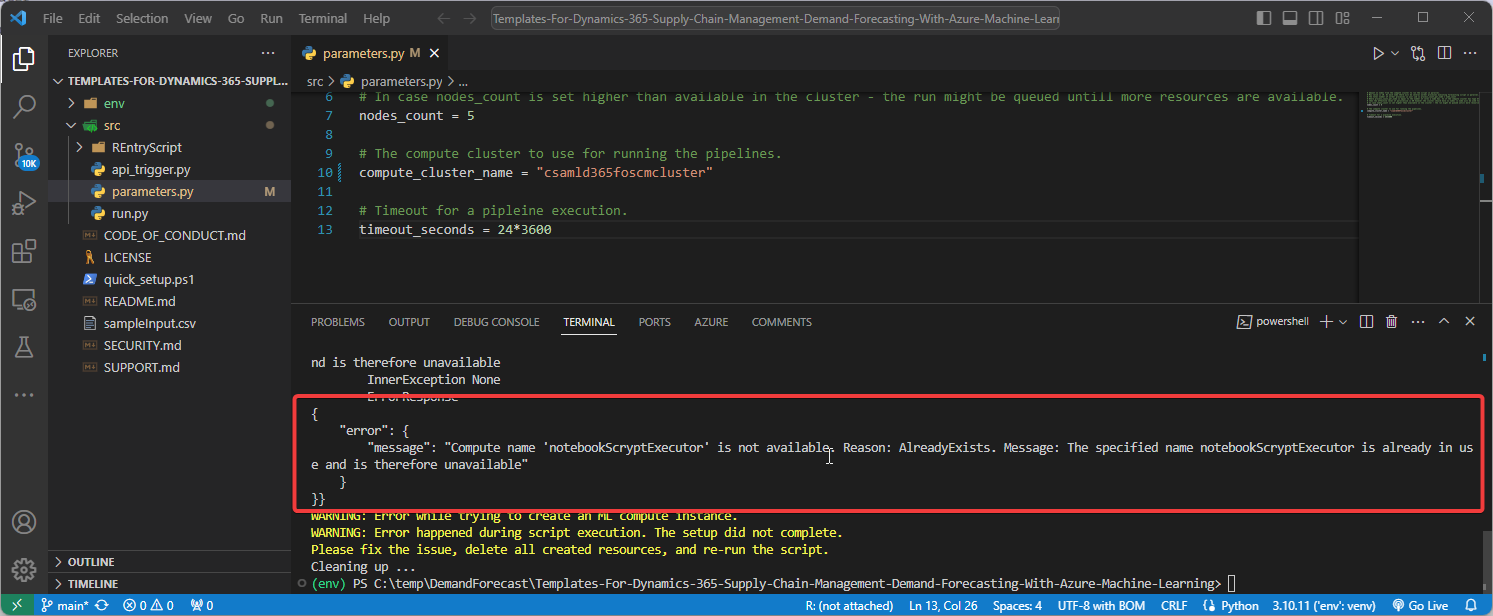
Edit the quick_setup.ps1 script and replace the name for the name you want and execute again the script.
This other error is related to Soft-deleted workspace exists.
ERROR: WorkspaceException:
Message: Unable to create the workspace. At least one resource deployment operation failed. Please list deployment operations for details. Please see https://aka.ms/arm-deployment-operations for usage details.
InnerException Azure Error: DeploymentFailed
Message: At least one resource deployment operation failed. Please list deployment operations for details. Please see https://aka.ms/arm-deployment-operations for usage details.
Exception Details:
Error Code: Conflict
Message: {‘status’: ‘Failed’, ‘error’: {‘code’: ‘ResourceDeploymentFailure’, ‘message’: “The resource write operation failed to complete successfully, because it reached terminal provisioning state ‘Failed’.”, ‘details’: [{‘code’: ‘BadRequest’, ‘message’: ‘Soft-deleted workspace exists. Please purge or recover it. https://aka.ms/wsoftdelete’}]}}
ErrorResponse
{
“error”: {
“message”: “Unable to create the workspace. At least one resource deployment operation failed. Please list deployment operations for details. Please see https://aka.ms/arm-deployment-operations for usage details.”
}
}
Because the previously execution has fails, the workspace created was deleted and exist in the Azure Machine Learning recycler, when I ran the script again, I used the same workspace, and it fails because detect this environment in the soft-deleted. To fix it, is only needed delete permanently the ML deleted environments and run again the script. You could use this guide to delete the ML environments Workspace soft deletion – Azure Machine Learning | Microsoft Learn

At the end, after fix all script execution errors, it was executed, and deployment finished successfully. The Demand forecast parameters that you need to configure the module are provided at the end of execution scrip:
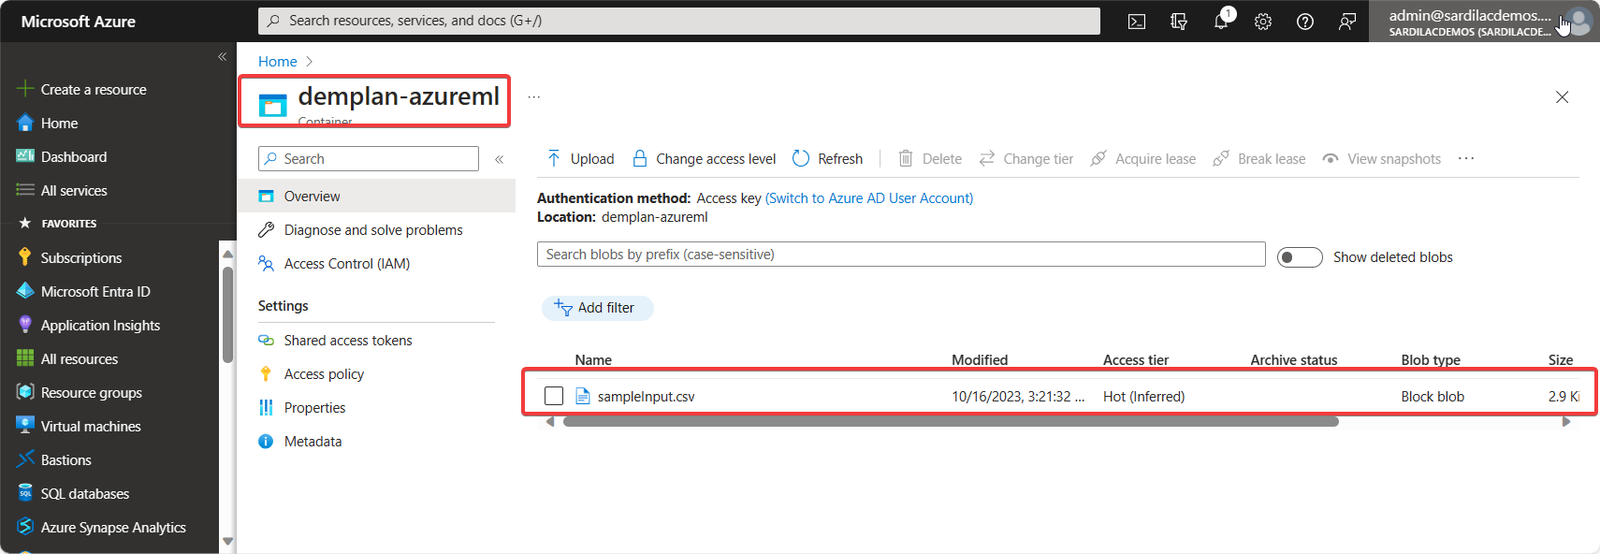
In Azure Machine Learning studio, upload the sampleInput.csv file that you downloaded when the repository was cloned in your local machine “C:\temp\DemanForecast” to the container that is named demplan-azureml. (The quick_setup.ps1 script created this container.) This file is required to publish the pipeline and generate a test forecast. For instructions, see Upload a block blob.
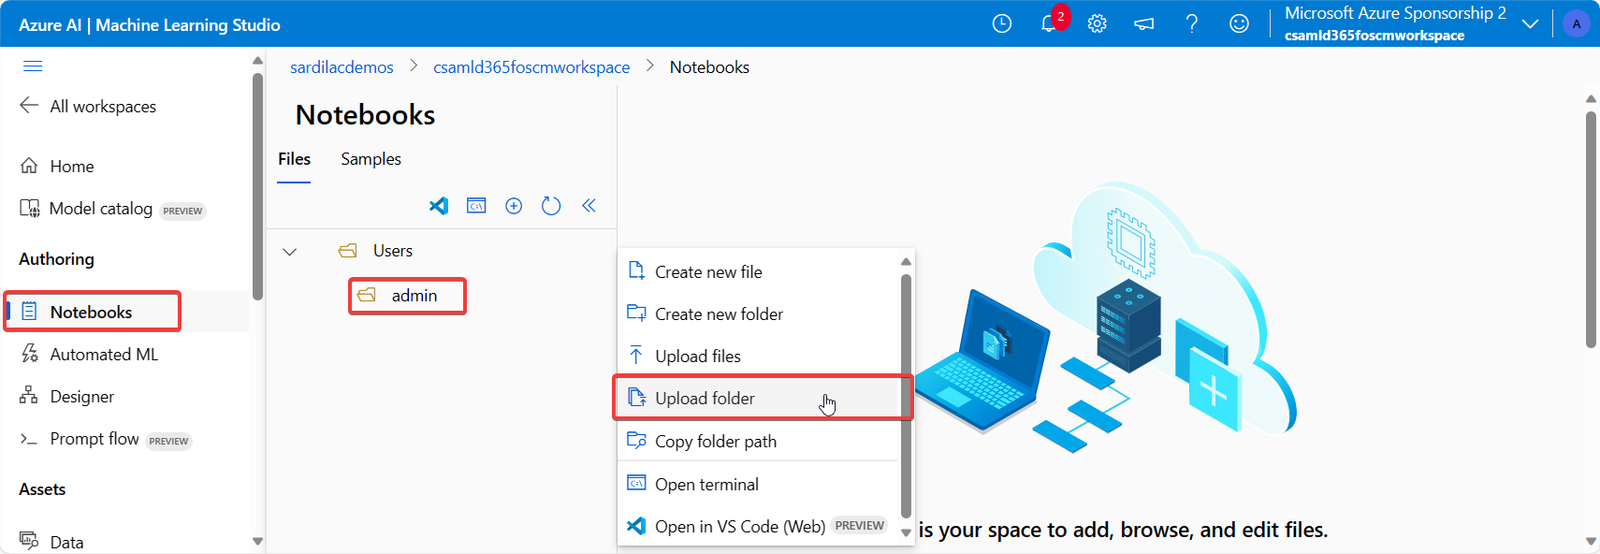
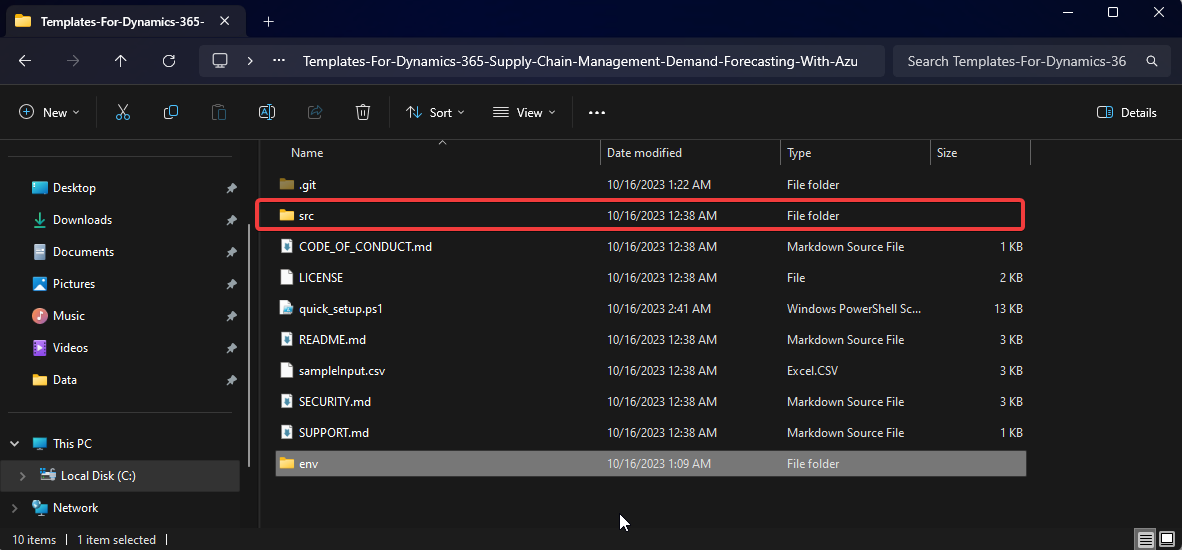
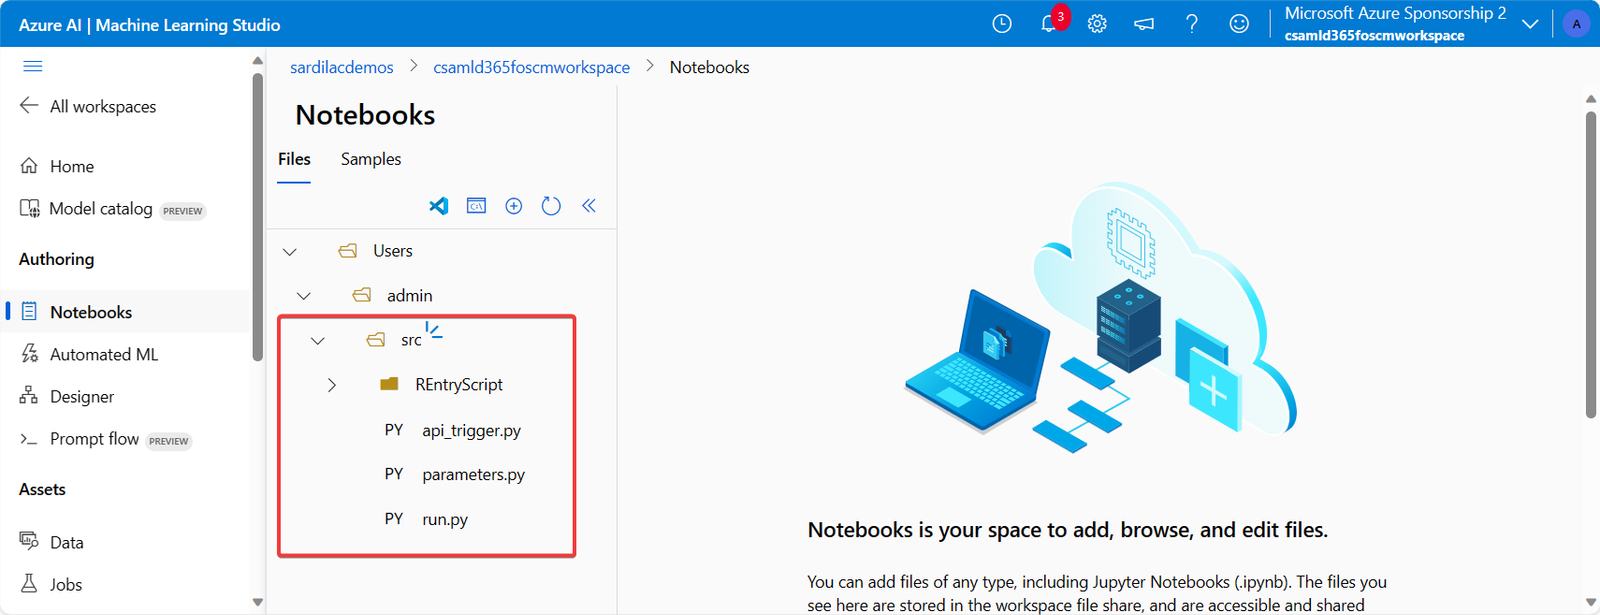
Open your Azure Machine Learning studio, select Notebooks in the navigator, find the following location in the Files structure: Users/[current user] and upload the src folder of the local cloned repository “C:\temp\DemanForecast“
Now, the files on the scr folder were uploaded:
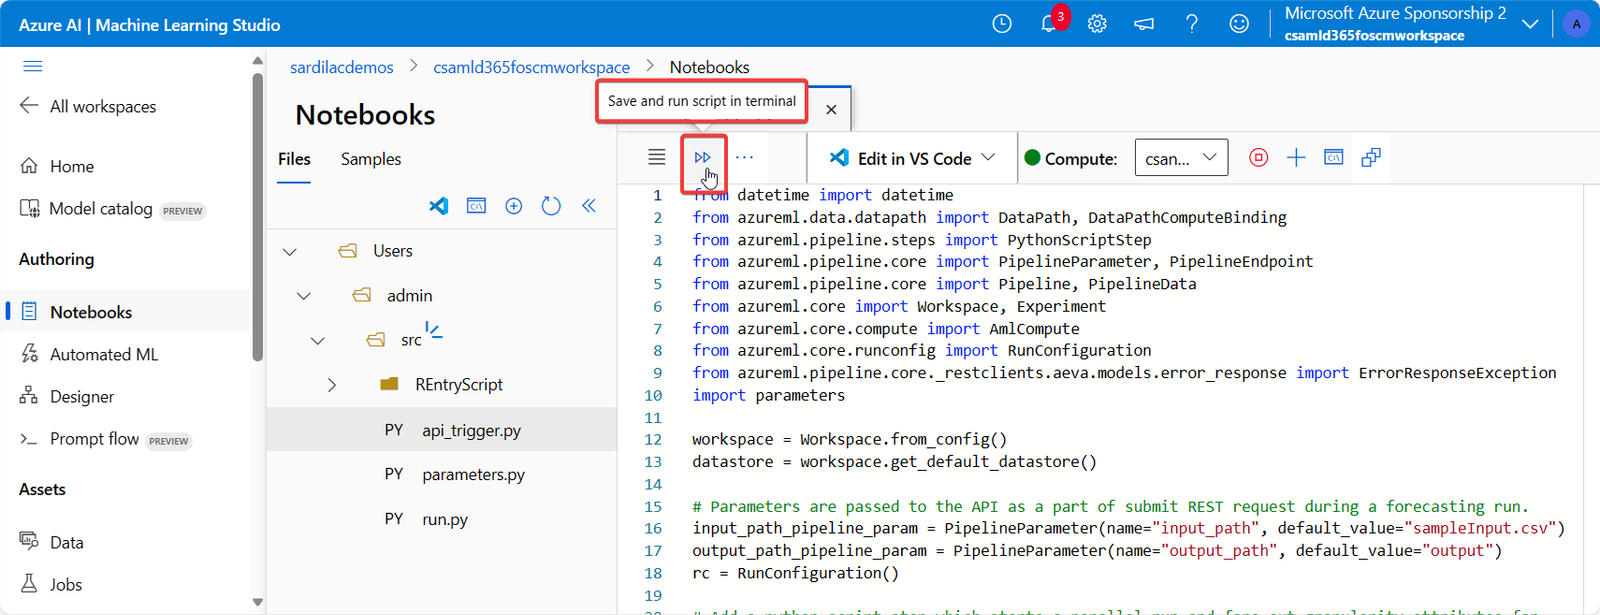
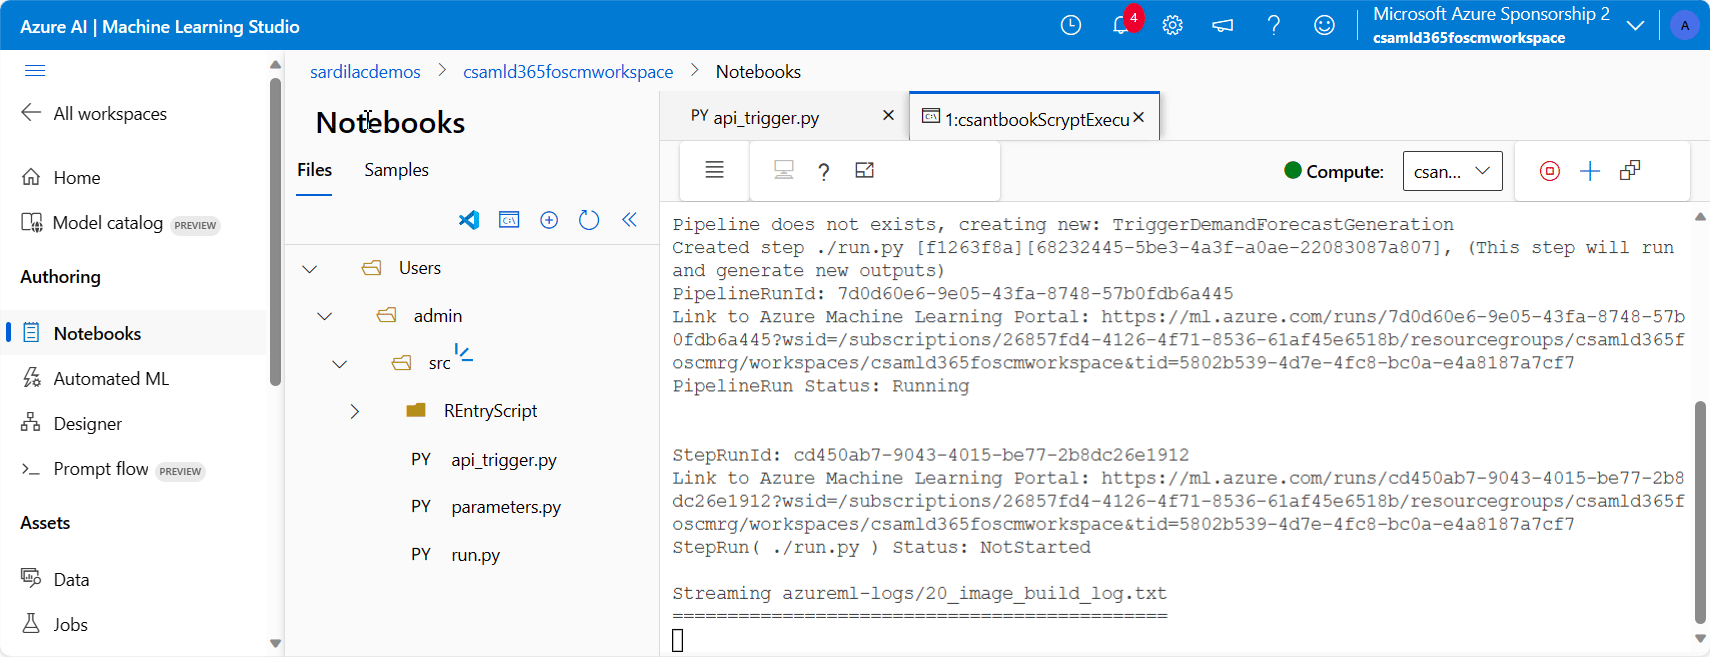
Select the api_trigger.py file that you just uploaded, and run it. It will create a pipeline that can be triggered through the API.
Setup Demand forecast parameters.
Use the following procedure to connect your Supply Chain Management environment to the machine learning service that you just set up in Azure.
- Sign in to Supply Chain Management.
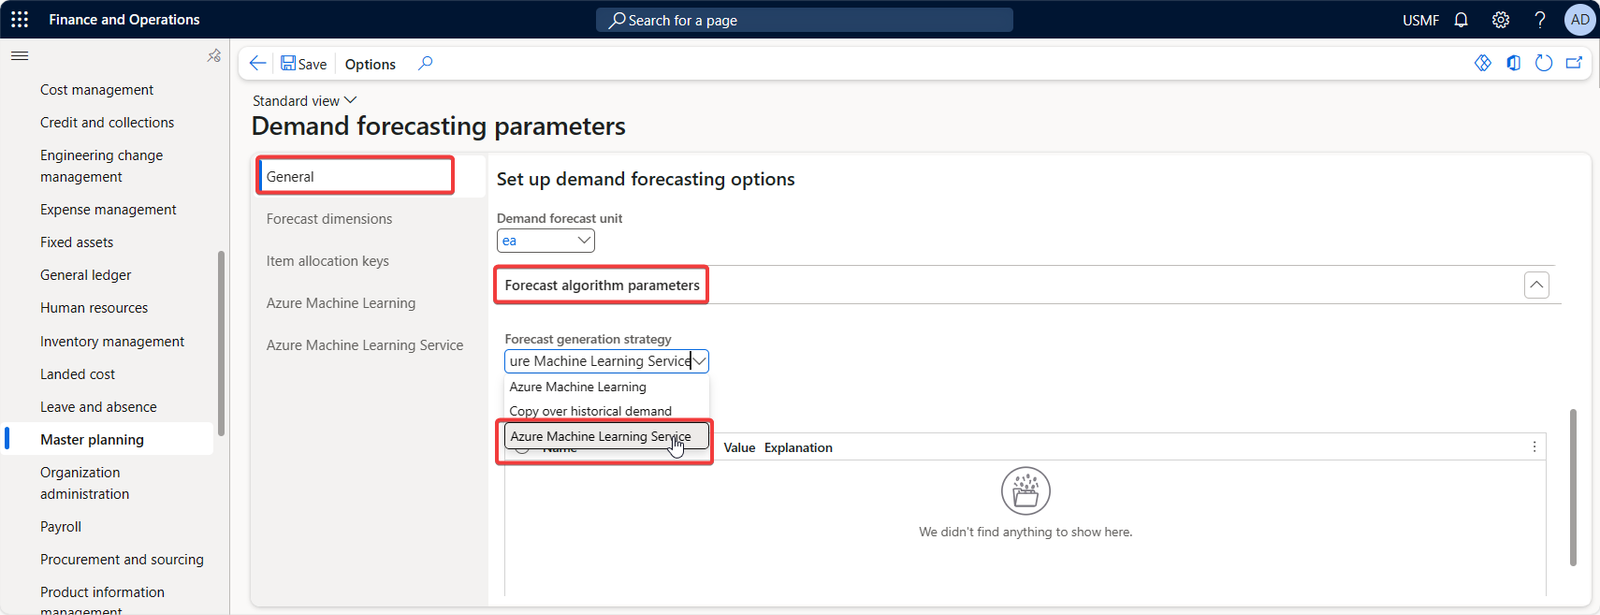
- Go to Master planning > Setup > Demand forecasting > Demand forecasting parameters.
- On the General tab, make sure that the Forecast generation strategy field is set to Azure Machine Learning Service.
4. On the Item allocation keys tab, make sure that the Forecast generation strategy field is set to Azure Machine Learning Service for each allocation key that should use the Azure Machine Learning Service for demand forecasting.
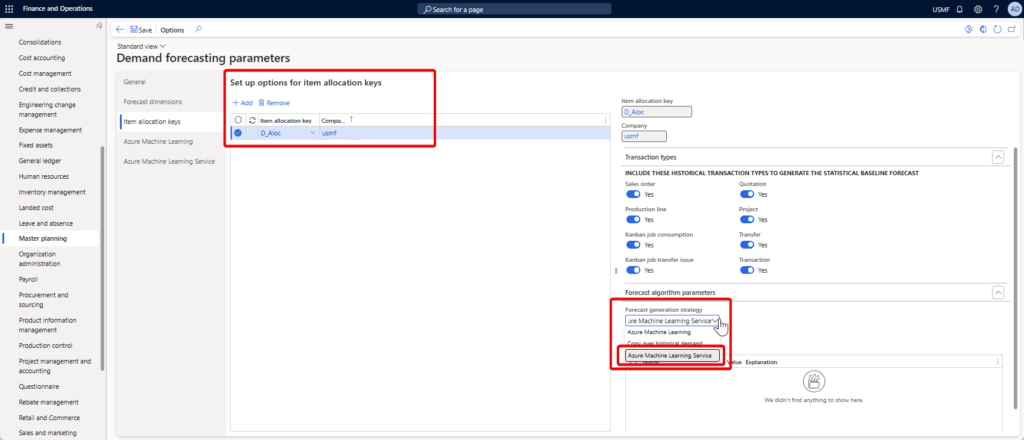
Note: Item allocation keys establish groups of items. A demand forecast is calculated for an item and its dimensions only if the item is part of an item allocation key. An item and its dimensions must be part of only one item allocation key if the item allocation key is used during forecast creation.
5. On the Azure Machine Learning Service tab, set the following fields:
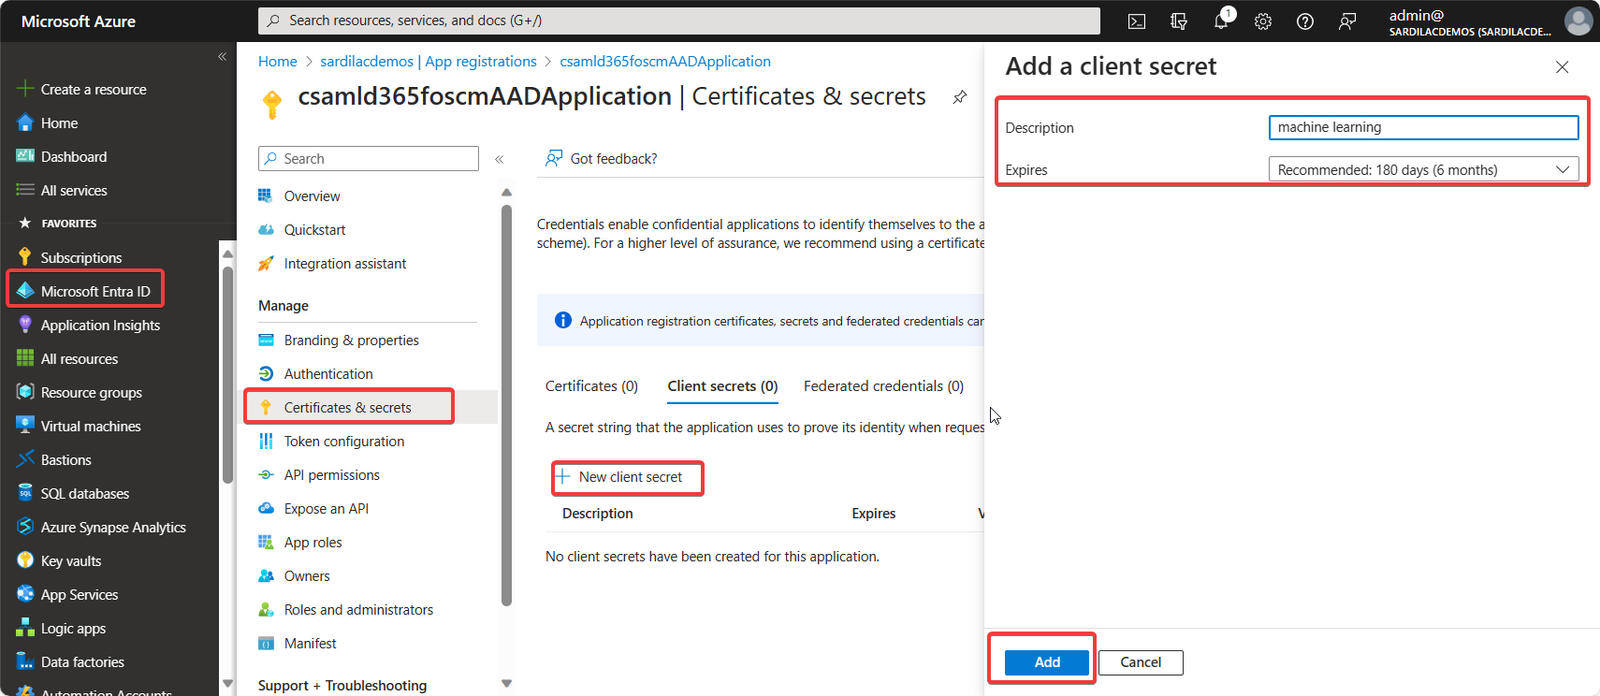
Remember that those parameters are provided at the end of the quick_setup.ps1 execution. The only parameter that was not provided is the secret that you should create on the AAD application.

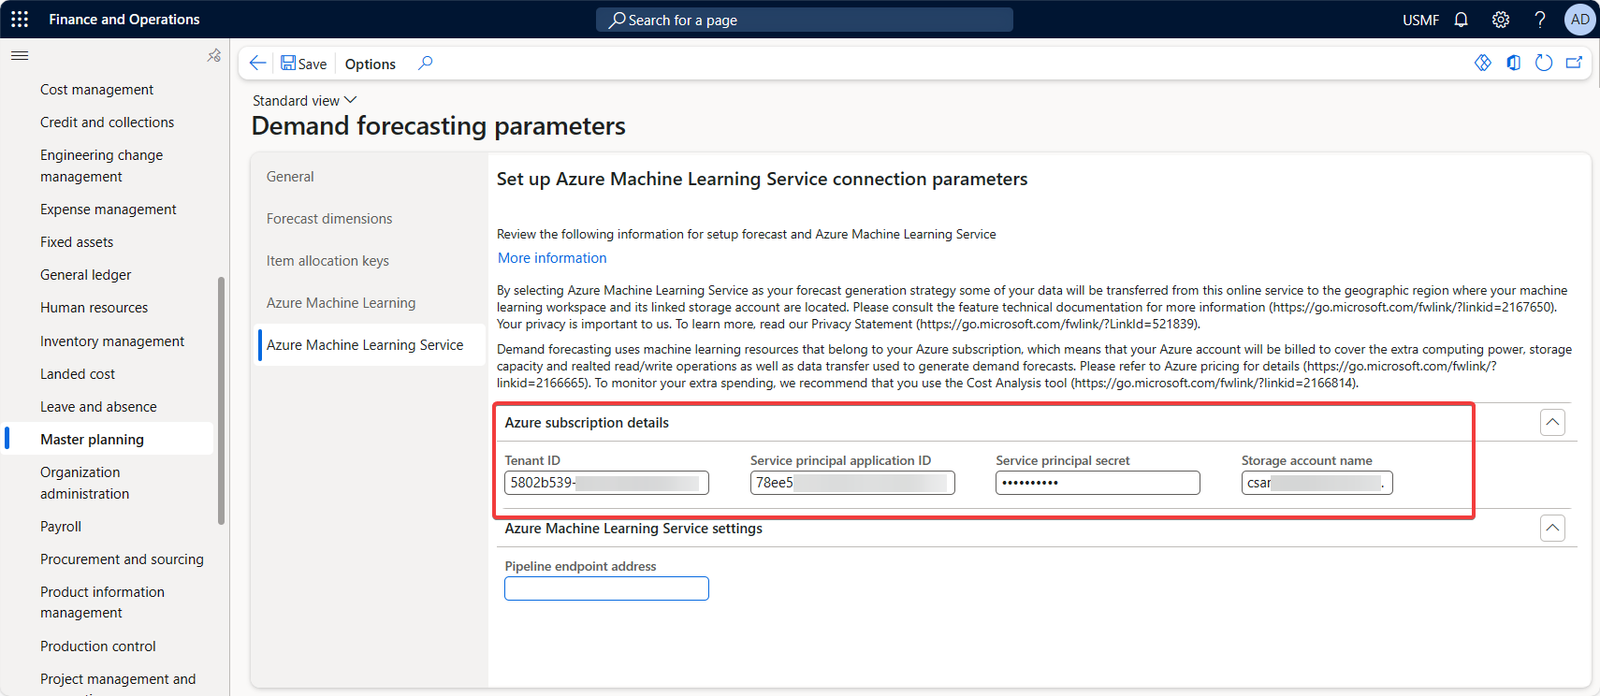
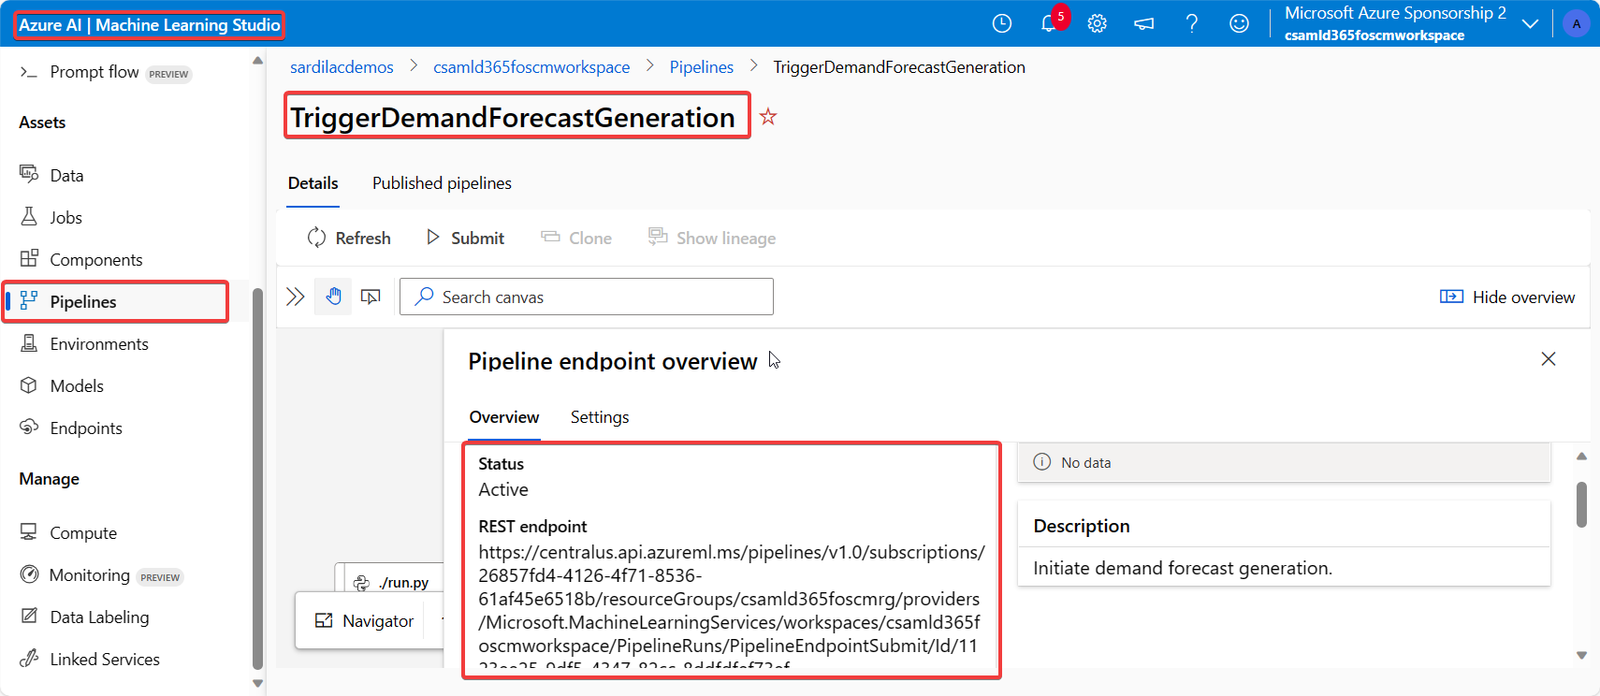
6. Pipeline endpoint address – Enter the URL of the pipeline REST endpoint for your Azure Machine Learning Service. You created this pipeline as the last step when you set up machine learning in Azure. To get the pipeline URL, sign in to your Azure portal, select Pipelines on the navigation. On the Pipeline tab, select the pipeline endpoint that is named TriggerDemandForecastGeneration. Then copy the REST endpoint that is shown.

Next step is generating the statistical baseline forecast that you can do following this procedure Generate a statistical baseline forecast – Supply Chain Management | Dynamics 365 | Microsoft Learn