The Vendor collaboration module is targeted at vendors who don’t have electronic data interchange (EDI) integration with Microsoft Dynamics 365 Supply Chain Management. It lets vendors work with purchase orders (POs), invoices, consignment inventory information, and requests for quotation (RFQs), and also lets them access parts of their vendor master data.
To know all vendor collaboration setup and functionality, please go here: Collaborate with vendors by using the Vendor portal – Supply Chain Management | Dynamics 365 | Microsoft Docs.
In this post, I’ll show you how to Provision Azure AD B2B users automatically using the vendor user request workflow.
The first prerequisite to configure the B2B integration, is create an AAD application registration, my recommendation is that you have separate App registration per environment; this will simplify the admin and maintenance.
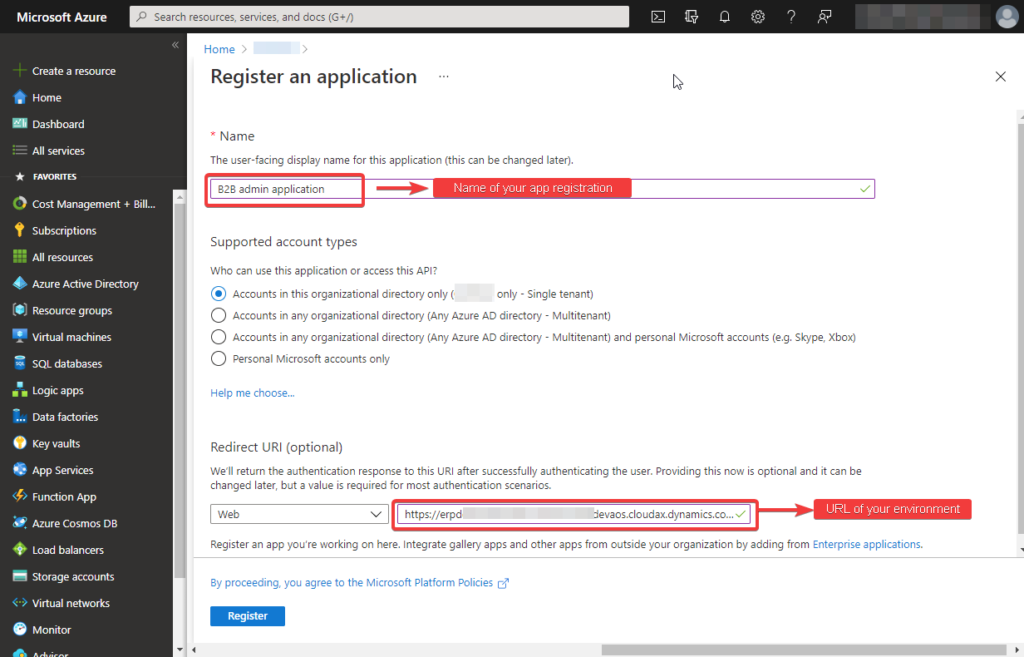
Follow these steps to create the app registration:
- Sign into the Azure portal.
- Search for and select Azure Active Directory.
- Under Manage, select App registrations > New registration.
- Enter a display Name for your application.
- Enter the URL of your environment [http://URL_ENV_.dynamics.com]
- Click on Register.
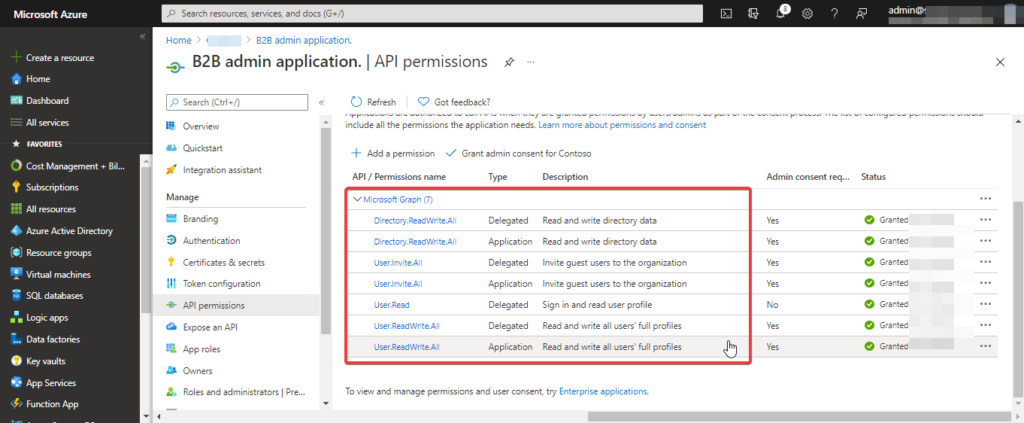
The next step is select the right API Permissions; in the Add API access pane, do the following:
Click the Select an API tab. Click Microsoft Graph, and then click Select.
In the Select permissions tab, select the following application permissions and set them to Yes:
- Invite guest users to the organization.
- Read and write directory data.
- Read and write all users’ full profiles.
Select the following delegated permissions and set them to Yes:
- Invite guest users to the organization.
- Read and write directory data.
- Read and write all users’ full profiles.
- Sign in and read user profile.
- Click Select and Done.
In the Required permissions blade, click Grant Permissions, and then click Yes to assign the permissions.
This should be the result:
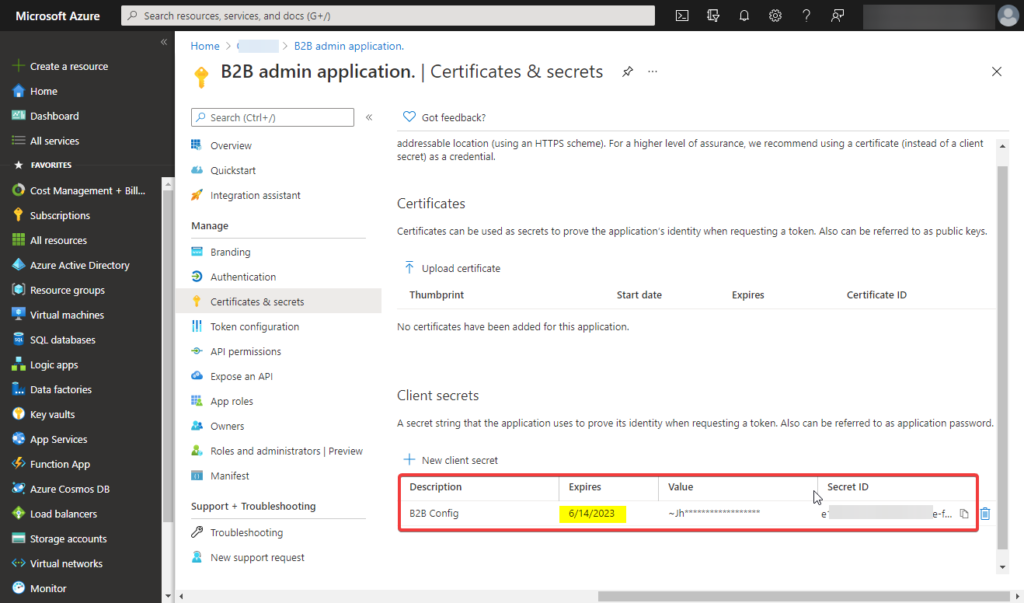
Add a client secret:
- In the Azure portal, in App registrations, select your application.
- Select Certificates & secrets > New client secret.
- Add a description for your client secret.
- Select an expiration for the secret or specify a custom lifetime.
- Client secret lifetime is limited to two years (24 months) or less. You can’t specify a custom lifetime longer than 24 months.
- Microsoft recommends that you set an expiration value of less than 12 months.
- Select Add.
- Record the secret’s value for use in your client application code. This secret value is never displayed again after you leave this page.
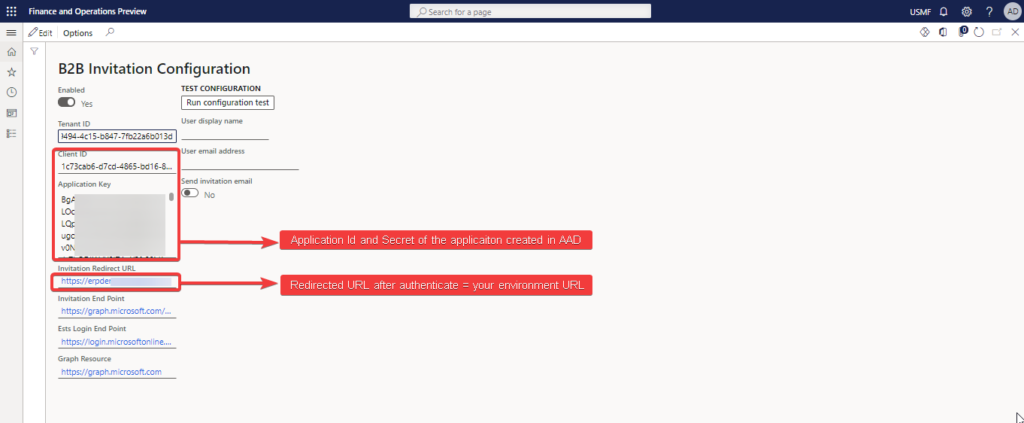
Configure the B2B invitation service settings:
- Sign into Finance and Operations as administrator.
- Navigate to the B2B Invitation Configuration page, and click Edit.
- Select Enabled.
- Verify that the Tenant ID is the same as the Directory ID (which you noted in step 3 of the previous procedure).
- In the Client ID field, enter the Application ID (which you noted in step 6 of the previous procedure).
- Enter the key Value, copied from the above procedure, into the Application Key field.
- Save the settings.
The next step is using the vendor user request workflow to define the different approval levels that one external user creation must meet.
Exist two ways to create the users in the AAD that can be manually or automatically, it will depend on the following workflow definition:
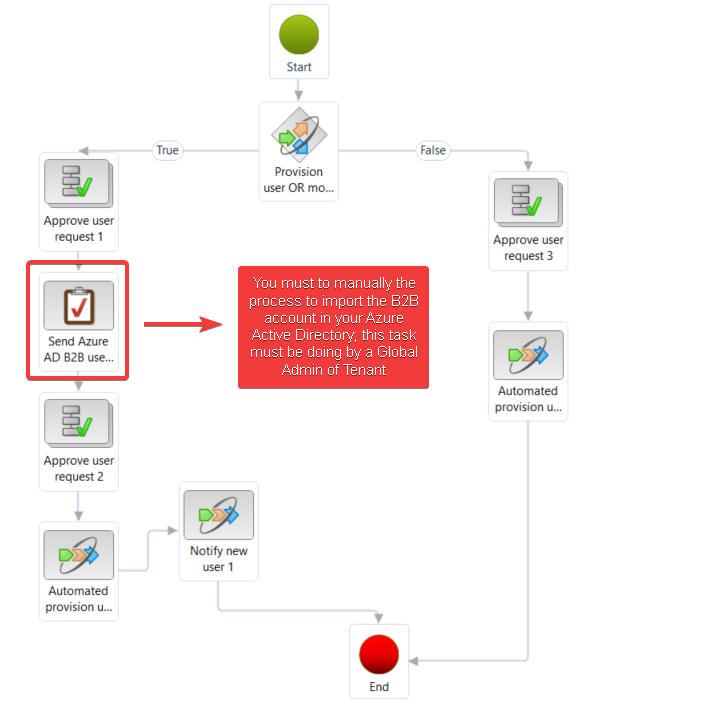
B2B users were exported manually to a .csv file. Then the Azure AD tenant administrator had to use this file to manually add the users to Azure AD using the Azure portal.
In the vendor user request form, when the workflow is executed and the “Send Azure AD B2B user task” is waiting to be marked as completed, you will see the button to download the csv and them import it manually in Azure Active Directory:
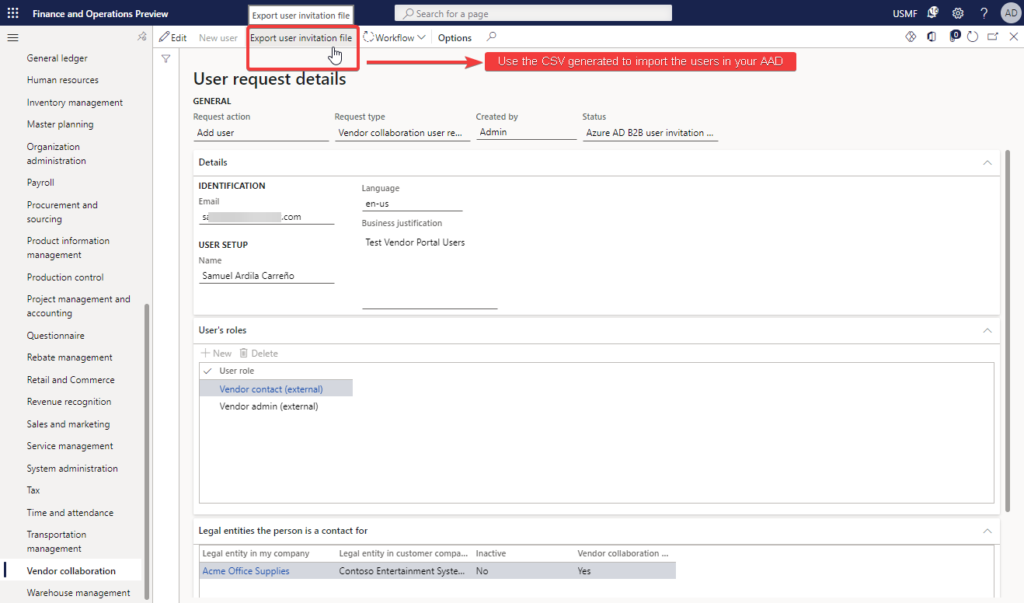
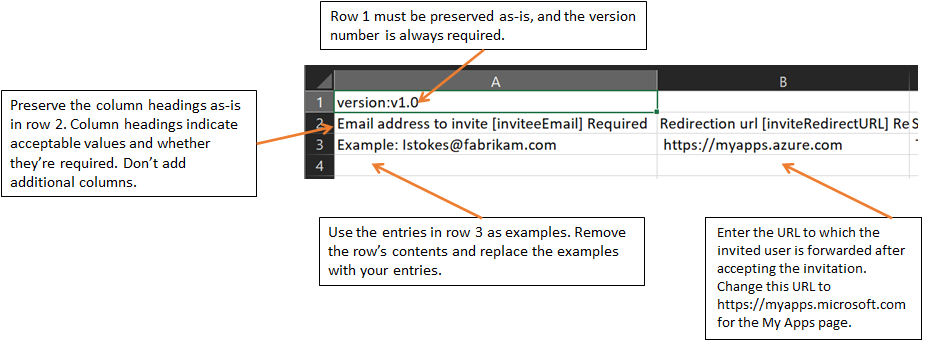
This is the structure of the CSV generated by D365FO:

The Send Azure AD B2B user task in the workflow, will help you to generate a basic csv with the information required by Azure Active directory to perform the bulk import, however the csv template must be adjusted to the AAD template requirements that you can review in Tutorial for bulk inviting B2B collaboration users – Azure AD | Microsoft Docs
Workflow definition to automatically creation:
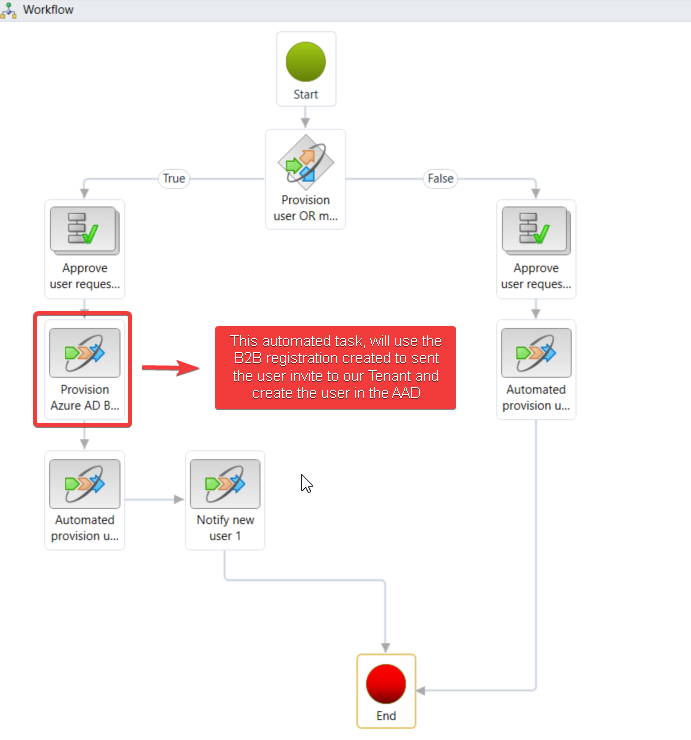
When “Provision Azure AD B2B” process is executed, this uses the previously parameters configured in B2B Invitation configuration to create directly the guest users in our Azure Active Directory and send the mail invitations to the vendor user; the end user will receive an email message like following:

When user accept the invitation, you will see the user created as a Guest in your AAD:

After completing all above steps for the setup, you and your environment will be able to use this Vendor Collaboration functionality, to request the user creation for contact vendors and assign the right roles accordantly to the needs.
- Create Vendor Account à Create a vendor account – Supply Chain Management | Dynamics 365 | Microsoft Docs
- Add contact information à Create a vendor account – Supply Chain Management | Dynamics 365 | Microsoft Docs
- Manage vendor collaboration users à Manage vendor collaboration users – Supply Chain Management | Dynamics 365 | Microsoft Docs
When the “Provision vendor user” is executed, this will call the workflow process configured previously to obtain the user creation approval and create the user in D365FO and Azure Active Directory.
Troubleshooting
- Same as other process that use workflow you must ensure that all batch services of Workflow are running(Configure the Workflow Message Processing batch job as critical – Finance & Operations | Dynamics 365 | Microsoft Docs).
- Ensure that you have properly configured the email provider (SMTP/Exchange) to deliver the different email messages generated by the Workflow process (Configure and send email – Finance & Operations | Dynamics 365 | Microsoft Docs).
- Ensure that users have the right configuration in the Email provider selection and Workflow options in your user options (httpS://YOUR_ENVIRONMENT_URL/?cmp=USMF&mi=SysUserSetup).
- Review that Email distribution batch is running.
- If this process has been configured previously, validate the secret expiration date.